In today’s world of ever-evolving technology, recording a video game or TV show in 4K video has become increasingly popular. Higher-definition images offer more detail and clarity than ever before, making for a much more immersive viewing experience.
Recording in 4K provides a higher level of detail when zooming into the image. This is especially useful for those who are creating instructional videos or tutorials, as it allows the viewer to focus on the details without sacrificing any quality.
The question then arises, can you still record 4K video content on a monitor that is HD only?
The answer is YES. In this article, we will discuss how you can record 4K on 1080p monitor (without 4K monitor) and also provide the best tools available to help you get the most out of your recording.
How to Record 4K on an HD Monitor
From Nvidia Settings
Nvidia is one of the leading brands in the world of computer graphics, dedicated to providing users with powerful, reliable hardware that can help them maximize their gaming and video production experience.
If you are using an Nvidia graphics card and an HD monitor, you can easily record 4K content by changing the settings in your Nvidia control panel.
Enabling Dynamic Super Resolution (DSR)
Dynamic Super Resolution (DSR) is a feature available through the Nvidia control panel that can be used to upscale content to 4K resolution. To enable this feature, open up your Nvidia control panel and navigate to ‘Manage 3D Settings’.
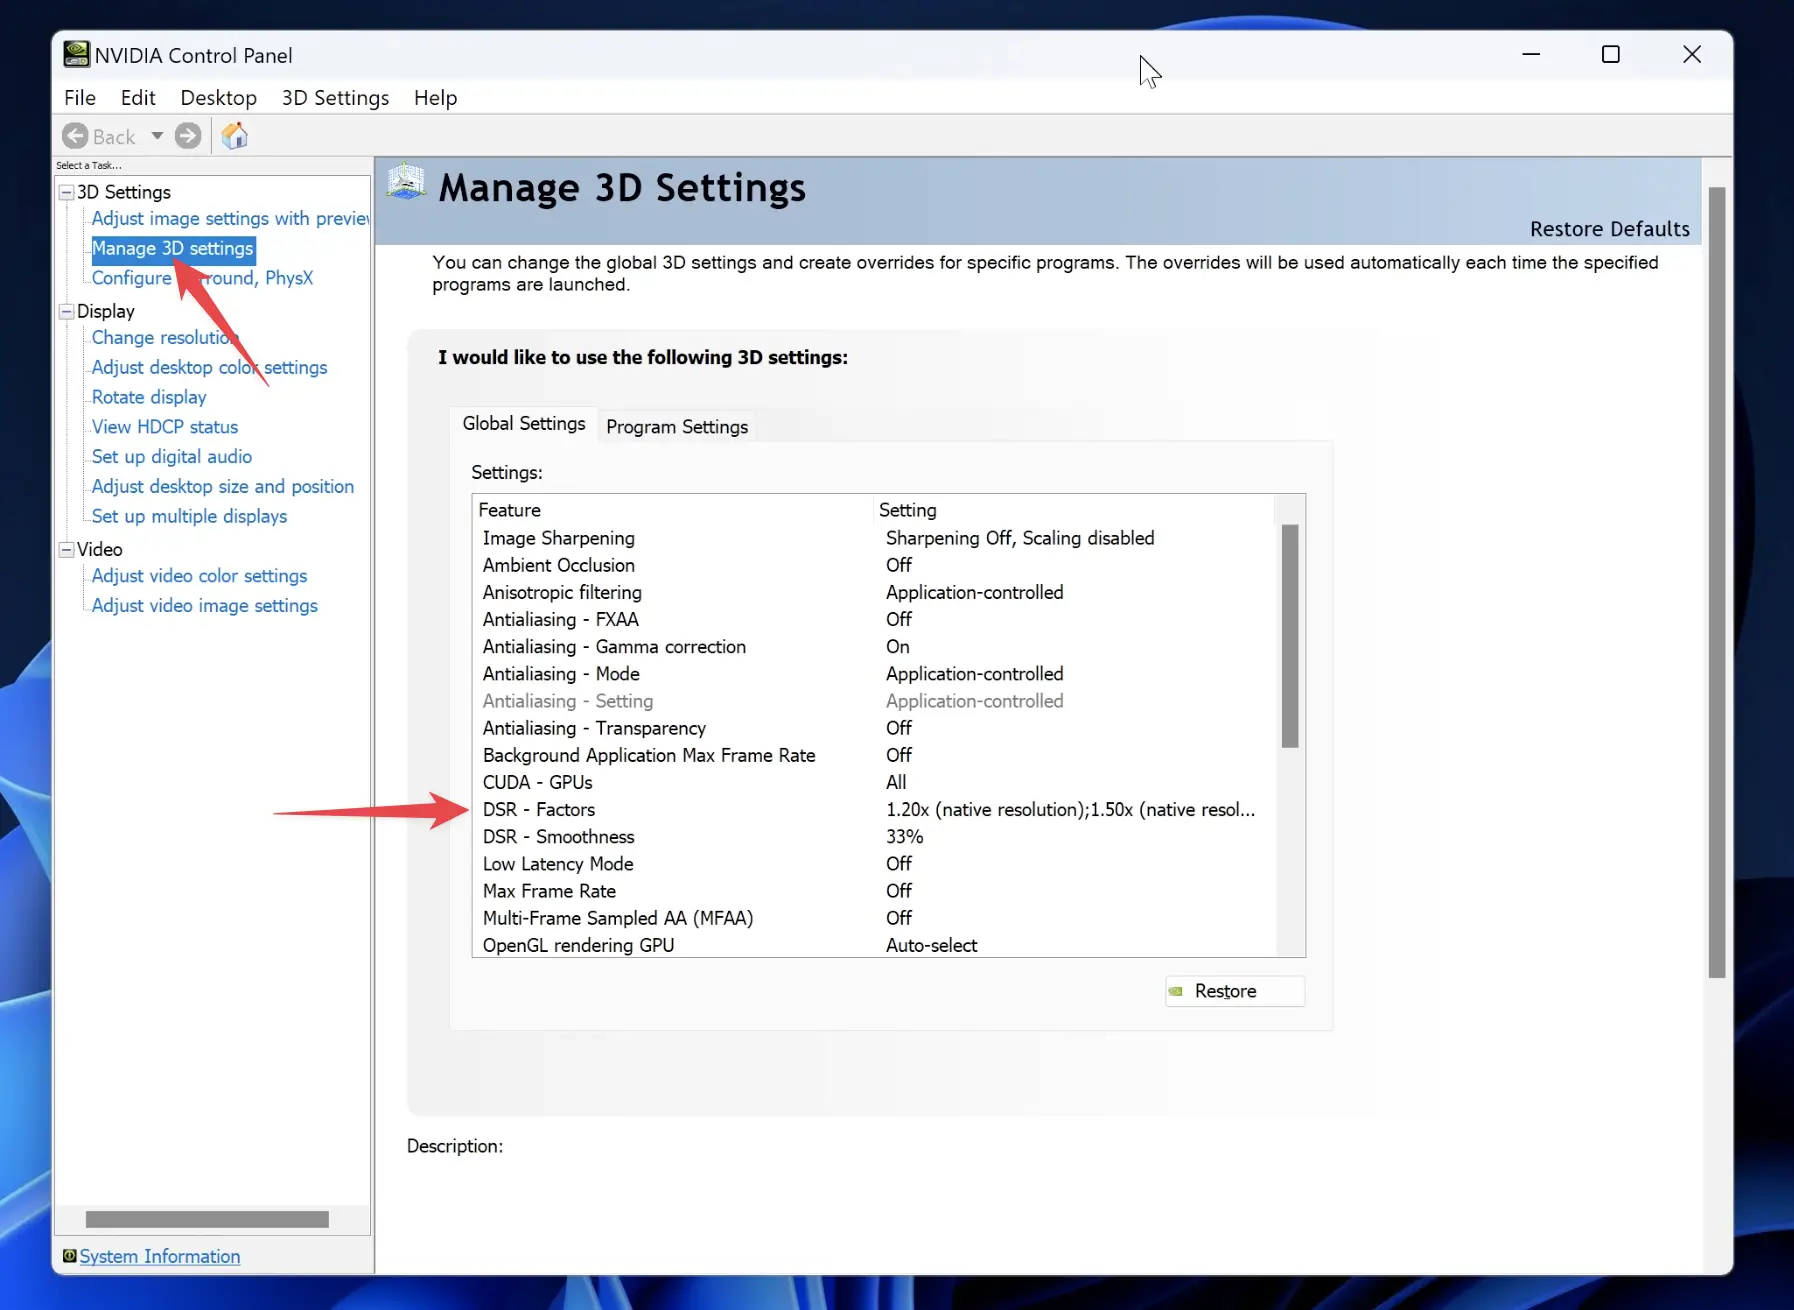
Within the ‘Global Settings’ tab you will find a checkbox for DSR Factors.
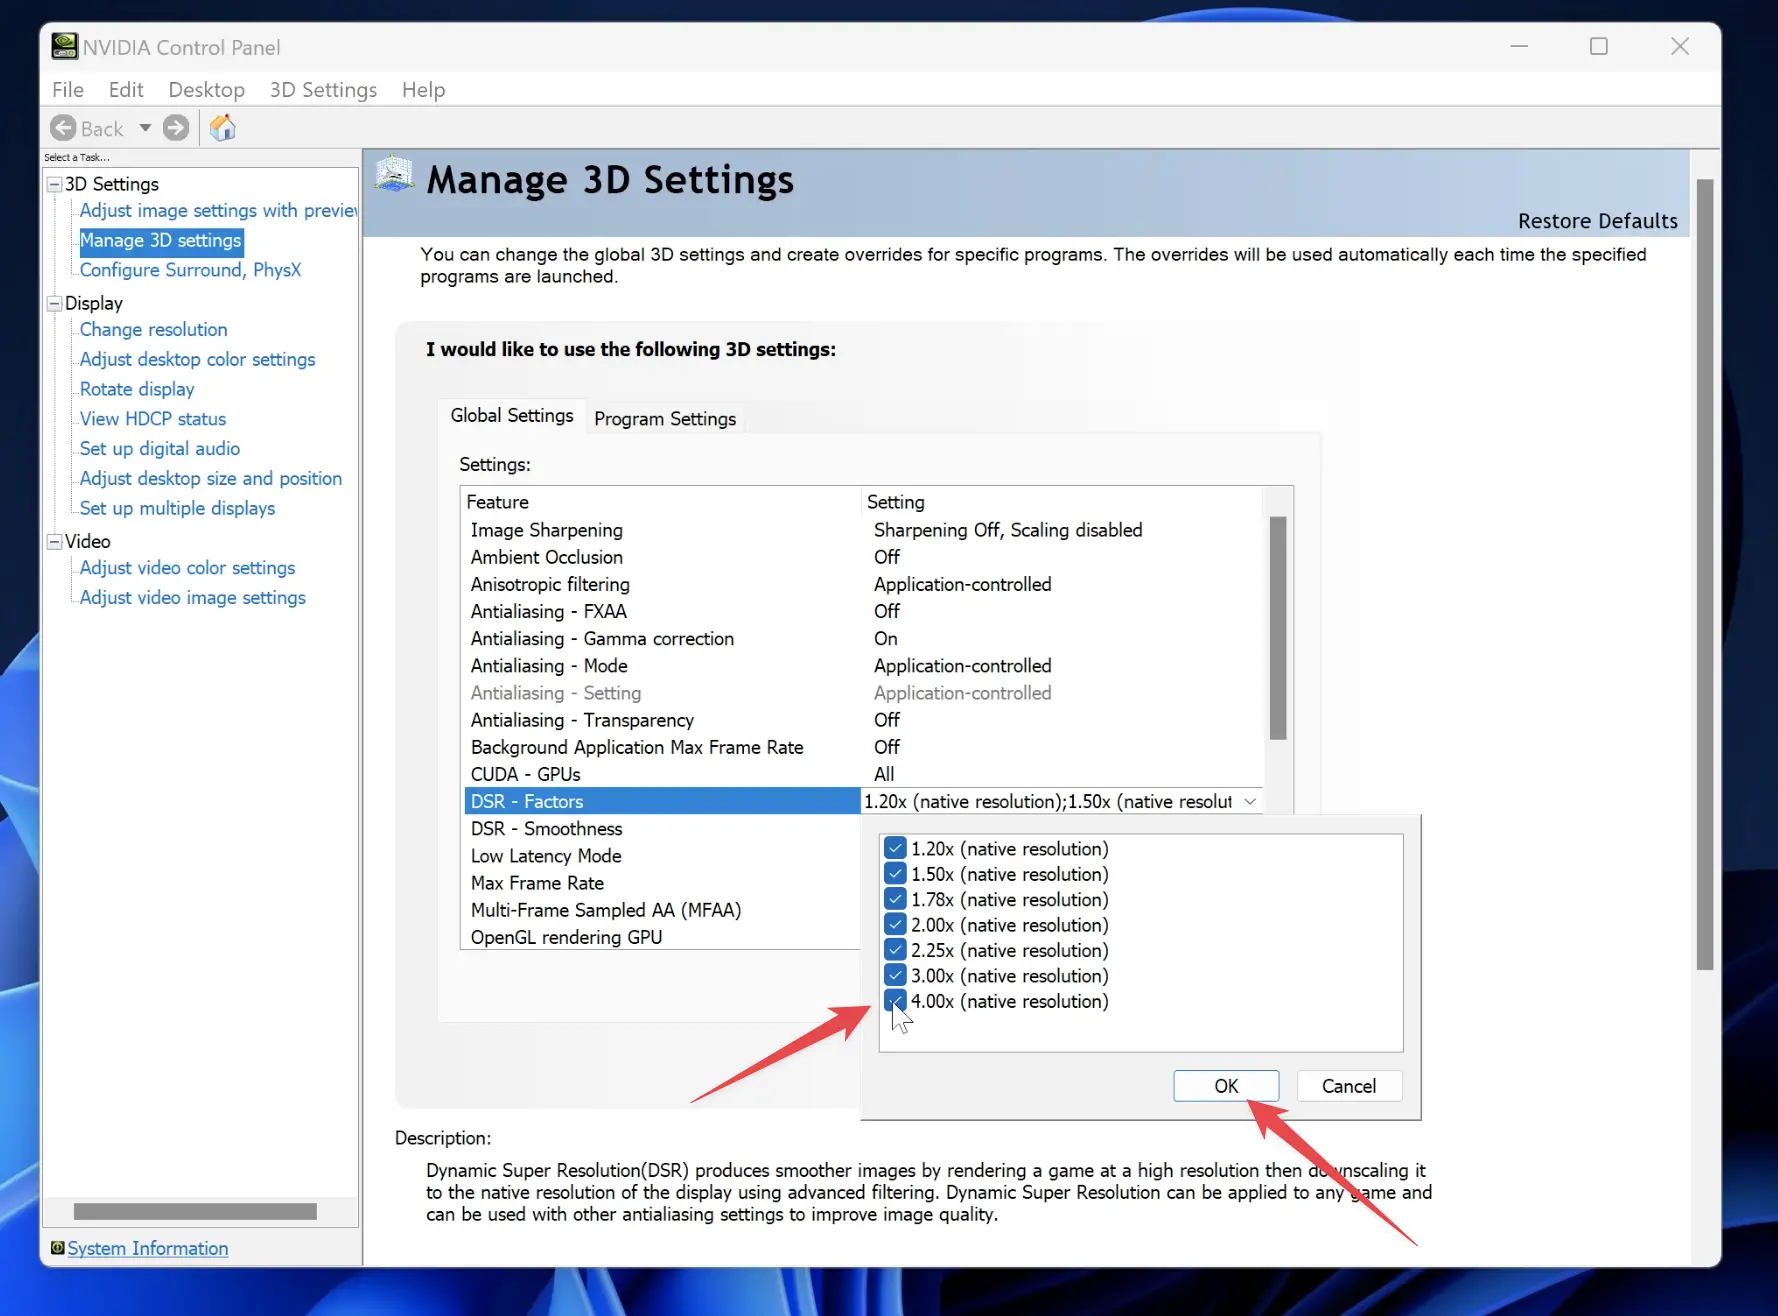
Check the box and select the scaling factor that you want to apply. For 4K resolution, you should select DSR-4.00x. This will upscale your content to 4K resolution for recording purposes. There are also other scaling factors available if you want to record at a lower resolution.
Changing the Display Resolution
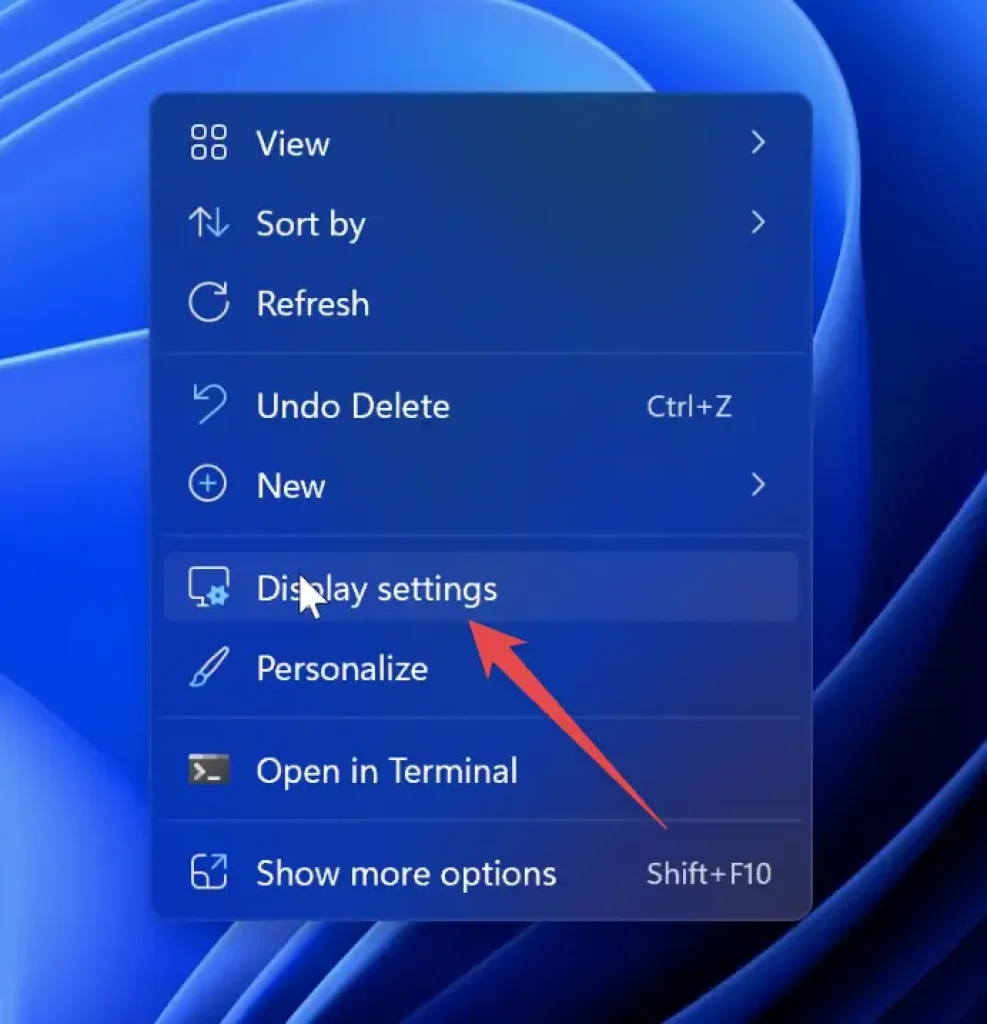
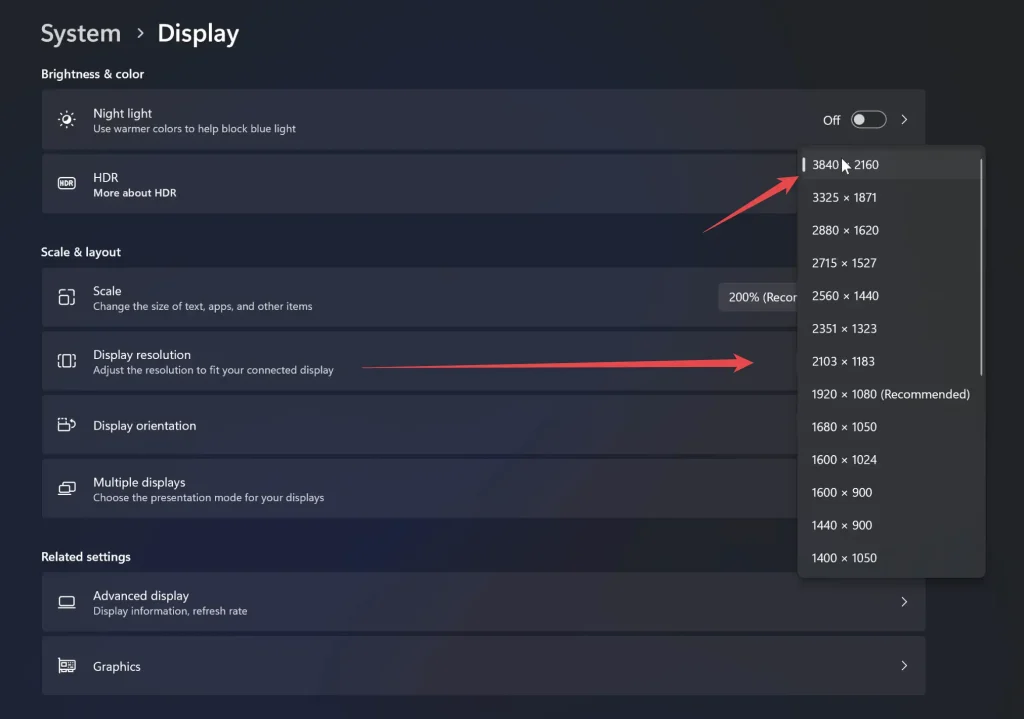
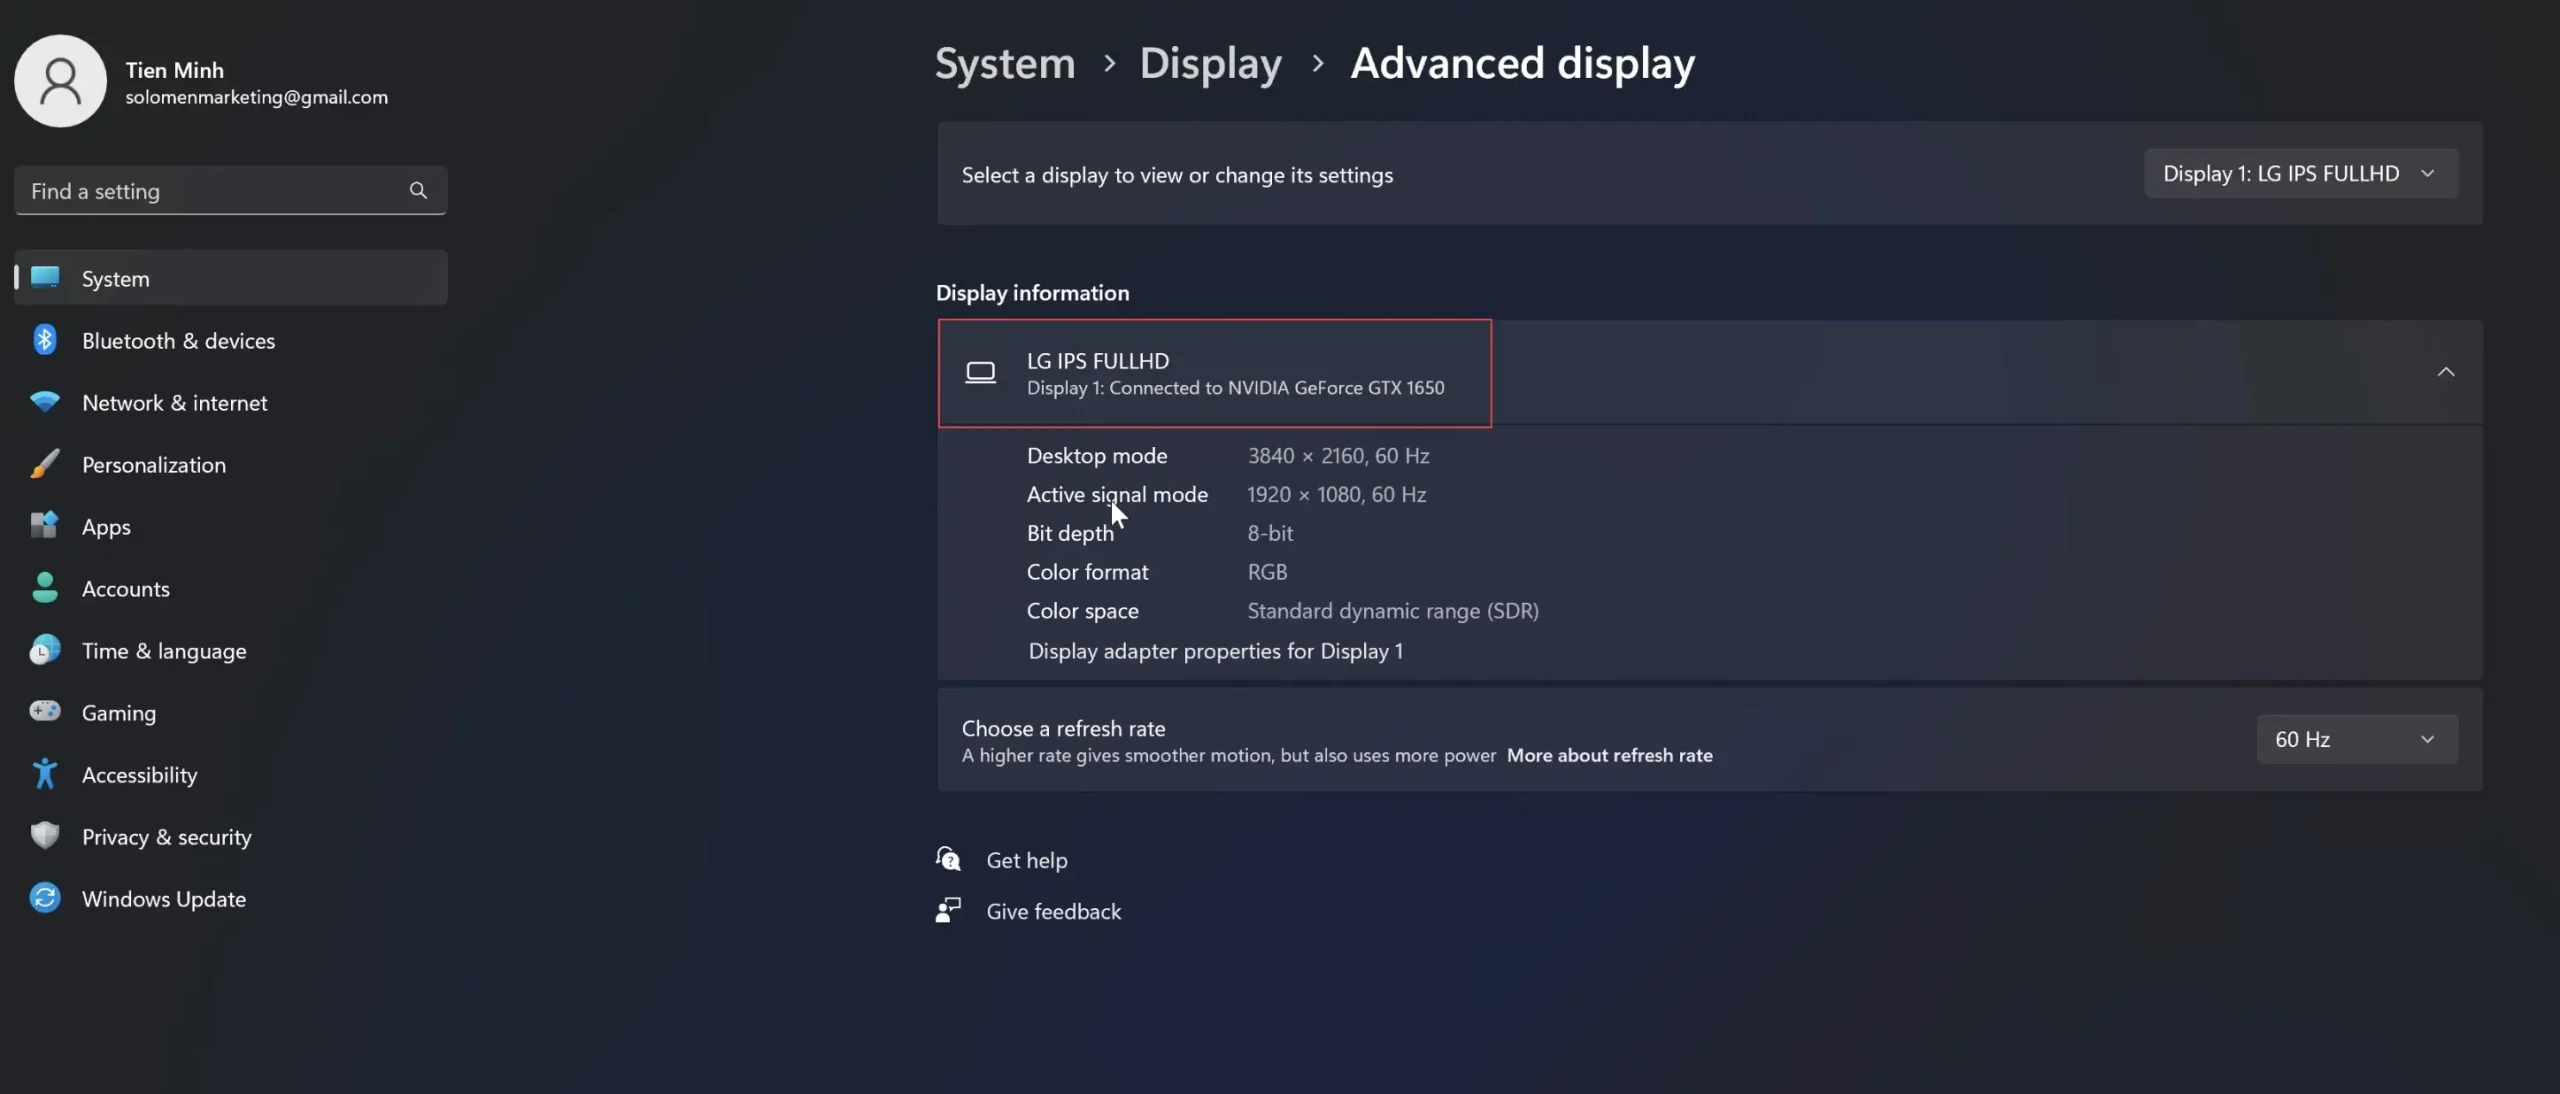
Now that you have enabled DSR, it is time to change the display resolution of your monitor. To do this, open up your Display Settings and select a higher resolution than what is currently set for your monitor.
There are many resolutions available, but for a 4K recording, you should select 3840×2160. Now, your monitor will now be capable of displaying content at 4K resolution, which means it is ready for recording!
Using OBS Software
OBS (Open Broadcaster Software) is a powerful video recording software available for Windows, Mac, and Linux that can be used to record high-quality videos with ease. It is also an excellent tool for streaming video content, allowing you to broadcast your 4K recording live on sites such as Twitch and YouTube.
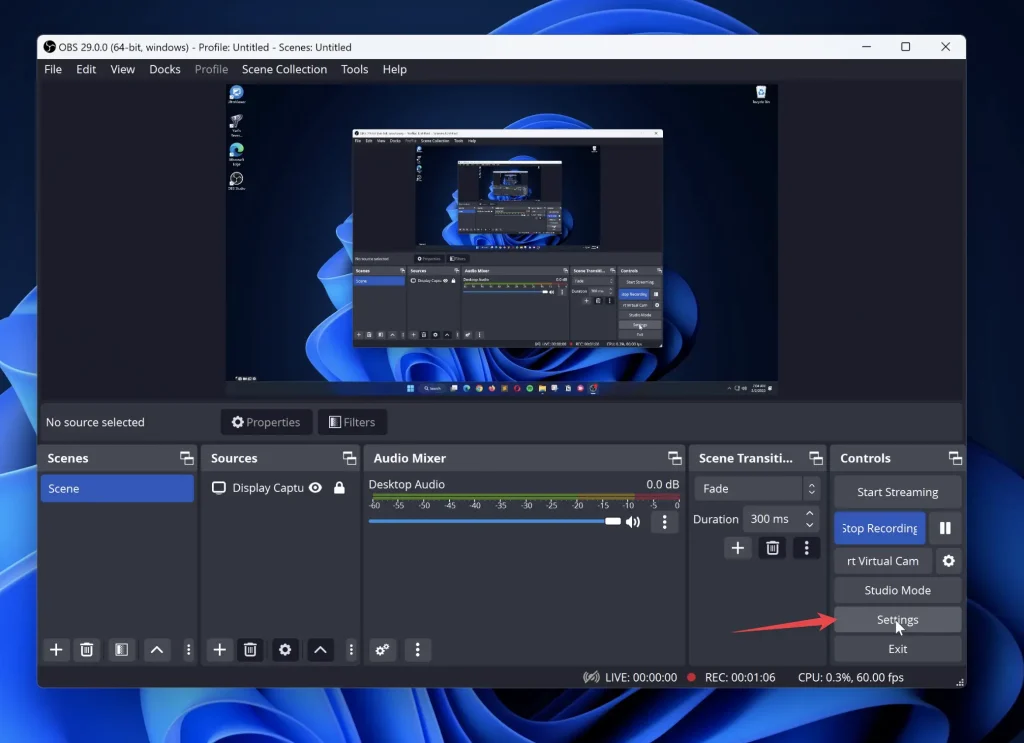
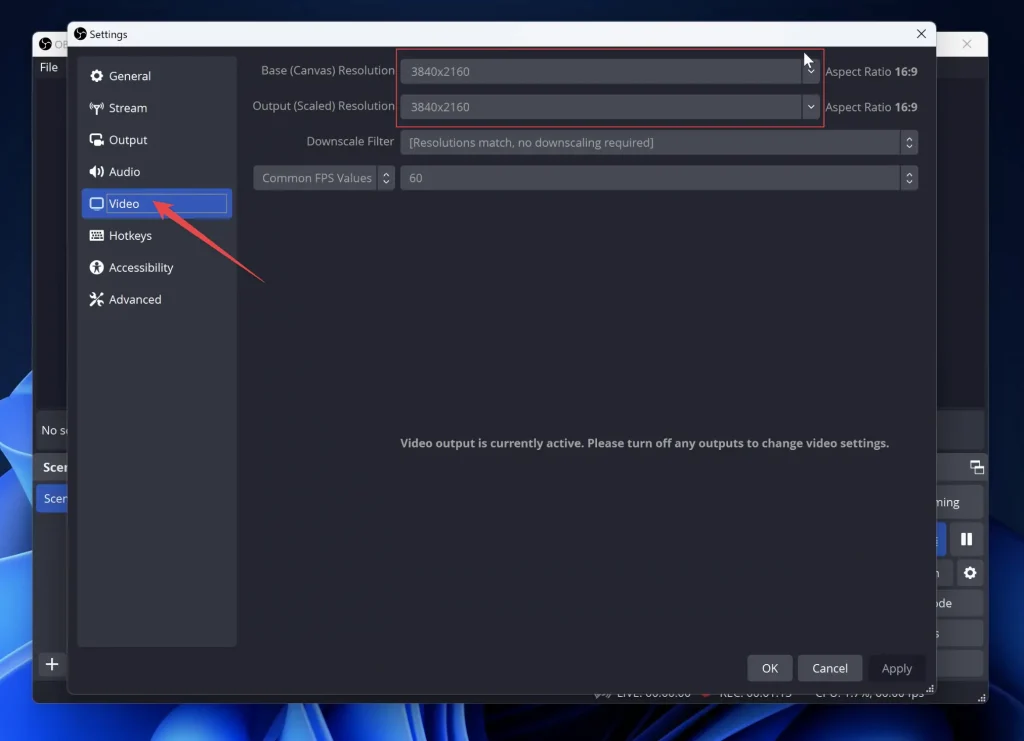
To begin recording in OBS, open the software and select “Settings” from the top menu bar. From the settings window, select the “Video” tab and change the Output Resolution to 4K. This will ensure that your recording is in 4K resolution.
Now you are ready to start recording! Simply press the “Start Recording” button and OBS will begin capturing your content in beautiful 4K resolution.
My YouTube Video
Here is a YouTube video I created using the above methods to record 4K content on an HD monitor. It shows a game and you can easily see the clarity and detail that 4K resolution provides, even when viewed on an HD monitor.
Use External Capture Card
External capture cards are specialized pieces of hardware that are used to record or stream video content from consoles, PCs, and other devices to a computer. They allow users to capture high-quality footage for gaming, streaming, and video production.
External capture cards typically feature HDMI or analog input, allowing users to connect their console or PC to the capture card. Once connected, users can record or stream their gameplay in high resolution with minimal latency. In addition, many capture cards come equipped with hardware-accelerated encoding for improved performance and low CPU usage.
Elgato HD60 X External Capture Card
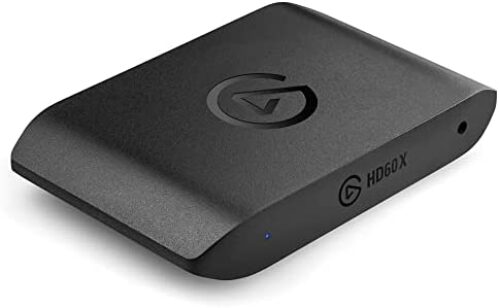
The Elgato HD60 X External Capture Card is a great product for anyone looking to capture and stream high-quality footage. The card is compatible with both Mac and Windows operating systems, as well as various streaming services like YouTube, Twitch, Facebook Gaming, Zoom, OBS, Streamlabs, and Vmix.
With the Elgato HD60 X, you get up to 4K60 HDR10, 1440p120, 1080p120, and VRR passthrough. Plus, this capture card is plug-and-play, there is no drivers or software are necessary.
Thanks to the ultra-low latency of the Elgato HD60 X, you won’t experience any lag or buffering when streaming. It also has no limitations on video length and resolution, so you can stream in high quality for as long as your storage allows.
- Plug and play
- Small stylish and lightweight design
- Compatible with Mac and Windows systems
- Ultra-low latency for lag-free streaming
- No limitations on video length or resolution
- Firmware updates frequently
- USB 3.0 instead of Thunderbolt 3 connection
- May overheat when streaming for extended periods of time.
- Expensive compared to other capture cards
Bonus: Recording Your Screen in 4K with QuickTime on Mac
Recording your screen in 4K is a great way to capture high-quality footage for any digital project you may be working on. Luckily, macOS makes recording your screen in 4K quite simple using QuickTime. I am using a Macbook Pro 2017 with macOS Big Sur.
Here’s how to do it:
Open the QuickTime Player on your Mac and choose ‘File’ > ‘New Screen Recording’.
Before starting to record, click the ‘Options’ button and select your desired mic as the audio source, you can also set a timer to start recording.
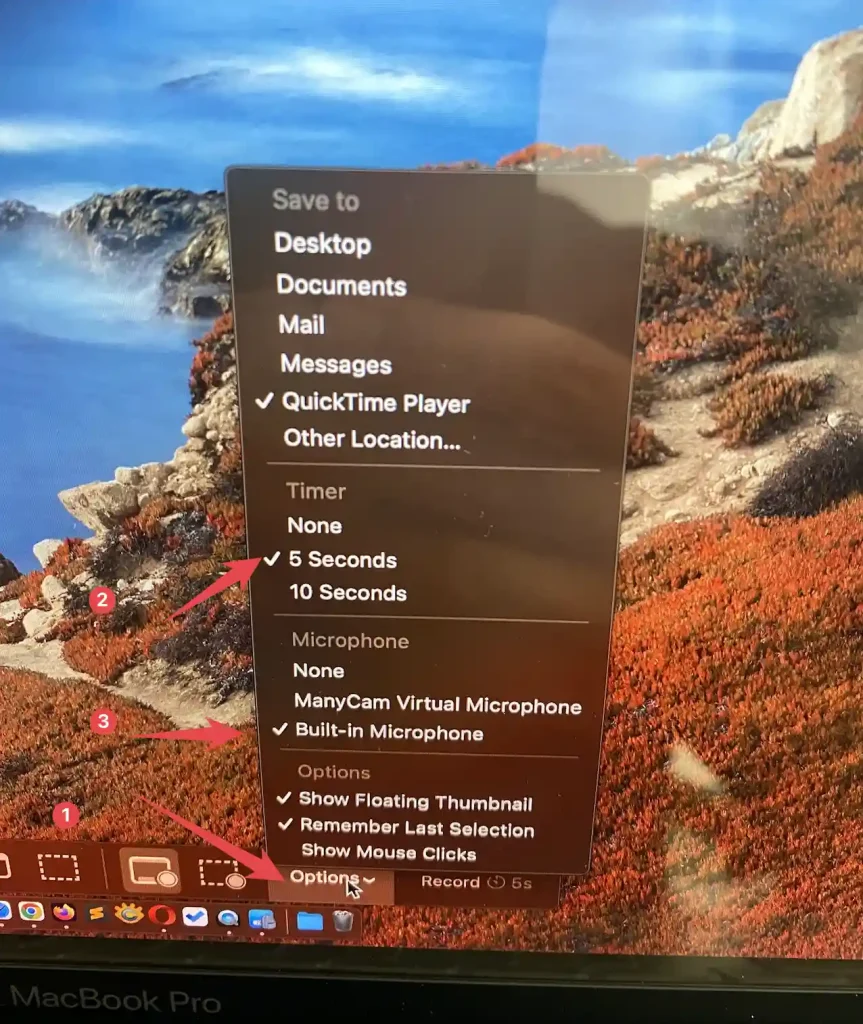
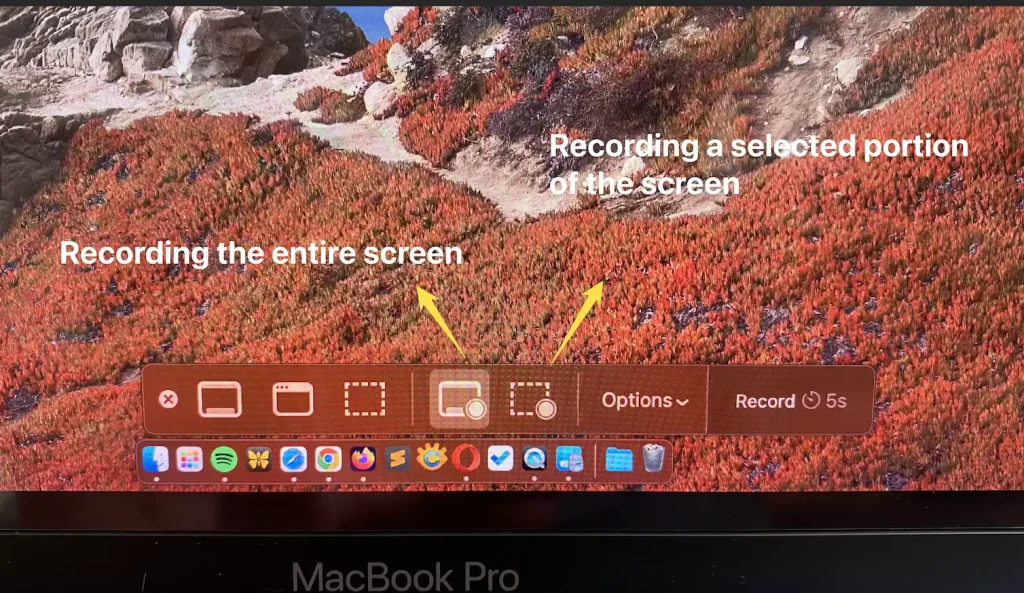
Select an area to record on your screen or the entire screen. I have selected the entire screen.
To stop the recording click the ‘Stop’ button at the top right of your screen.
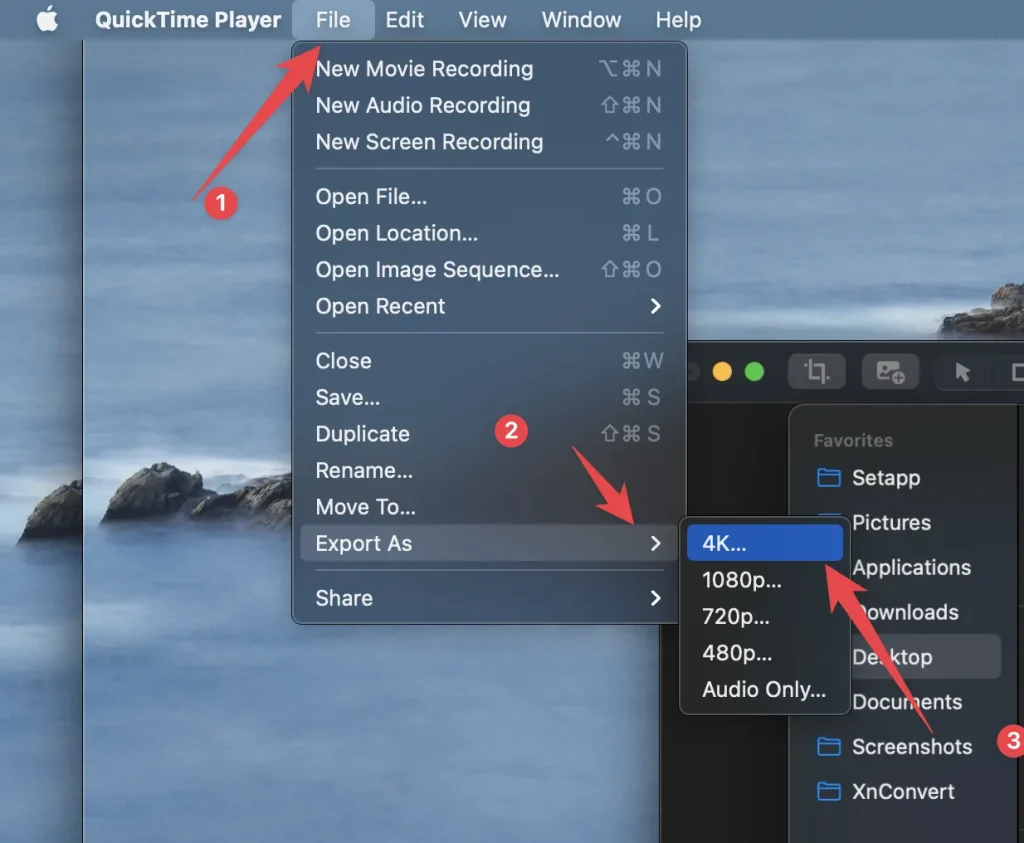
After stopping the recording you may go to ‘File’ > ‘Export As’ and select 4K resolution.
Now, you have successfully recorded your screen in 4K resolution. You can now use the file for any project or just store it on your Macbook for use later. If you need to record more than one screen, then just repeat the steps above as many times as necessary.
FAQs
1. Can we record in 4K without a 4K monitor?
Yes, you can record in 4K without a 4K monitor. To do this, you need to enable DSR (Dynamic Super Resolution) on your graphics card settings and set the display resolution of your monitor to 3840×2160. You can also use an external capture card like the Elgato HD60 X for recording in 4K.
2. What is the best software for recording in 4K?
There are many video recording software available for Windows, Mac, and Linux that can be used to record 4K content. Some of the top choices include OBS (Open Broadcaster Software), Camtasia, Bandicam, and Snagit. However, OBS is my favorite as it is free and easy to use.
3. Can I stream a 4K video live?
Yes, you can stream 4K video live using OBS or an external capture card like the Elgato HD60 X. Both of these tools allow users to broadcast their recording in real time with minimal latency.


Pete is a software engineer who currently works full-time managing MarsScreen.com. On the side, he enjoys coding his own projects and spending time with his wife and two dogs. When he's not working or hanging out with family and friends, you can find him playing the guitar or running. My Instagram.